This is our final version of the poster advertising the digipak. Using our poster research we found out the codes and conventions and decided to follow these closely in order to create a successful poster in order to get sales on our digipak. We decided to use a very similar style to our digipak in order to show that they are part of the same product. We made sure to add in the links to the social media pages so that fans are able to easily follow them for updates and news about upcoming tours/album releases. We also included a preview of the digipak so that when people see it on iTunes or in stores they can look at it and recognise the cover which then should make them buy it. We also decided to include two of the songs on the poster "blank space" and "shake it off", this means if fans have heard these songs they will be able to expect more similar songs from the album. We put the text "available now" in contrast with the colour on her jumper in order to make it stand out on the poster, this lets them know that they can go and buy it straight away.
Saturday, 7 May 2016
Final Digipak
This is our final digipak that was created in Photoshop. Using our research of current existing digipaks we were able to easily identify codes and conventions like for example, the barcode, the tracklist and the record label.
Friday, 6 May 2016
Our Record Label
We decided to use the image of a brain on our logo as it works in correlation with the word 'mind'. We thought that using an image in our logo would let it be a lot more memorable as opposed to just the words; it is also conventional to use an image in your logo. Through researching other companies logos we were able to find out that it's typical to include the word "record" or "records" in your label name, knowing this we followed this convention as it allows us to create a successful label. We chose this particular font as we thought it looked professional and that's what message we wanted our company to give out.
Thursday, 5 May 2016
Video Construction
Monday 11th April 2016

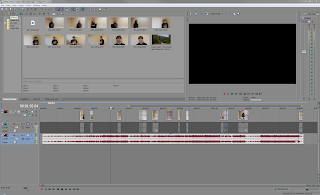
To begin with the video we first transferred all our videos to the computer and placed them into Sony Vegas Pro which is the software we'll be using to edit this video. The first thing we went through was syncing up all of the lip syncing shots so that we'd know what room we had to play with afterwards. This took a fair bit of time but we decided it was key to get the lip syncing down as then we wouldn't have to work on it later on.
Tuesday 12th April 2016

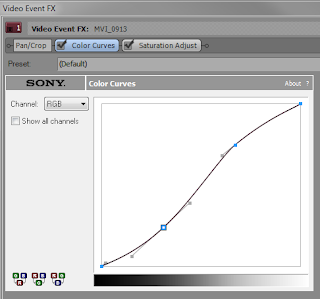
Today we added in a large portion of the footage as we had a lot of spare time. Doing this let us get a general overview of what our video will turn out like, this was beneficial as we were able to chop and change shots where we see fit. We also played around with colour curves and the saturation of the shots to fix where it was too dark or too bright.
Wednesday 13th April 2016

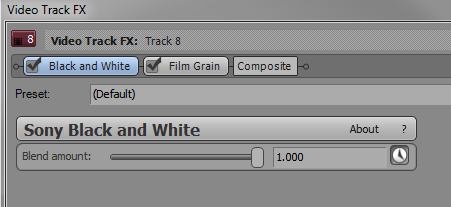
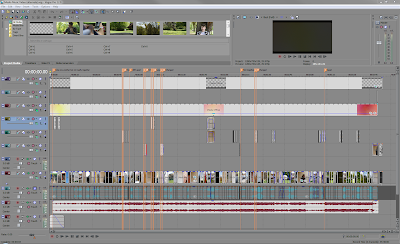
Today we had a bit of a rejig with the footage in order to make it tell the story better, this is because when we looked over what we had done already we decided that it was a bit all over the place in terms of the story and this clearly isn't what we wanted our video to do. We also decided it would be good if we made the entire video desaturated as it's supposed to convey a sad message which black and white does well at.
Monday 18th April 2016
Today whilst editing the video we realised we were beginning to start lacking on footage, we decided it would be beneficial to make some of the footage last longer in the video and so just added bits onto the end of certain parts. This helped and added on 15 seconds of extra video which is quite a big chunk of time considering the length of the overall video.
Thursday 21st April 2016
Today we had unfortunately ran out of original footage for our video and so required more in order to complete the video. Knowing this we planned out times in order to shoot more and therefore finish the video. Overall this was just a minor blip and could've clearly been a lot worse had we ran out of footage the day before the deadline.
Friday 29th April 2016

Twitter Page
We decided to create a Twitter profile for our artists as we know that it is one of the most efficient ways of getting an audience due to it's interactibility with fans. Using this social media we are able to update fans on what the artists are getting up to on a daily basis with photos or videos. It's also a very useful tool as we are able to make use of hashtags trends where users will also be able to see our profile and tweets and take a look at the page if it appeals to them.
https://twitter.com/BlaylockLucy
Facebook Page
Using Facebook we were able to easily promote the artists by adding new photos or videos and even dates for tours and/or album releases, such as the release of their new Digipak as seen as the header. A long with this I added to the event section dates for upcoming tours/gigs so that fans can book tickets easily. After this I connected the Facebook page to our website and Twitter page so that fans can keep up to date by following all forms of social media. With the use of Facebook our artists were able to simply grow their fan base through communication with the fans, we also knew that our target audience would be using social media such as Facebook and Twitter and so this makes it much simpler to connect with them.
https://www.facebook.com/Lucy-Blaylock-and-Danny-Reginatto-1089017987835215/timeline
Subscribe to:
Posts (Atom)